环境配置
1.conda配置python3.9的环境
2.cuda和cudnn安装
3.依赖下载
cuda版本torch安装
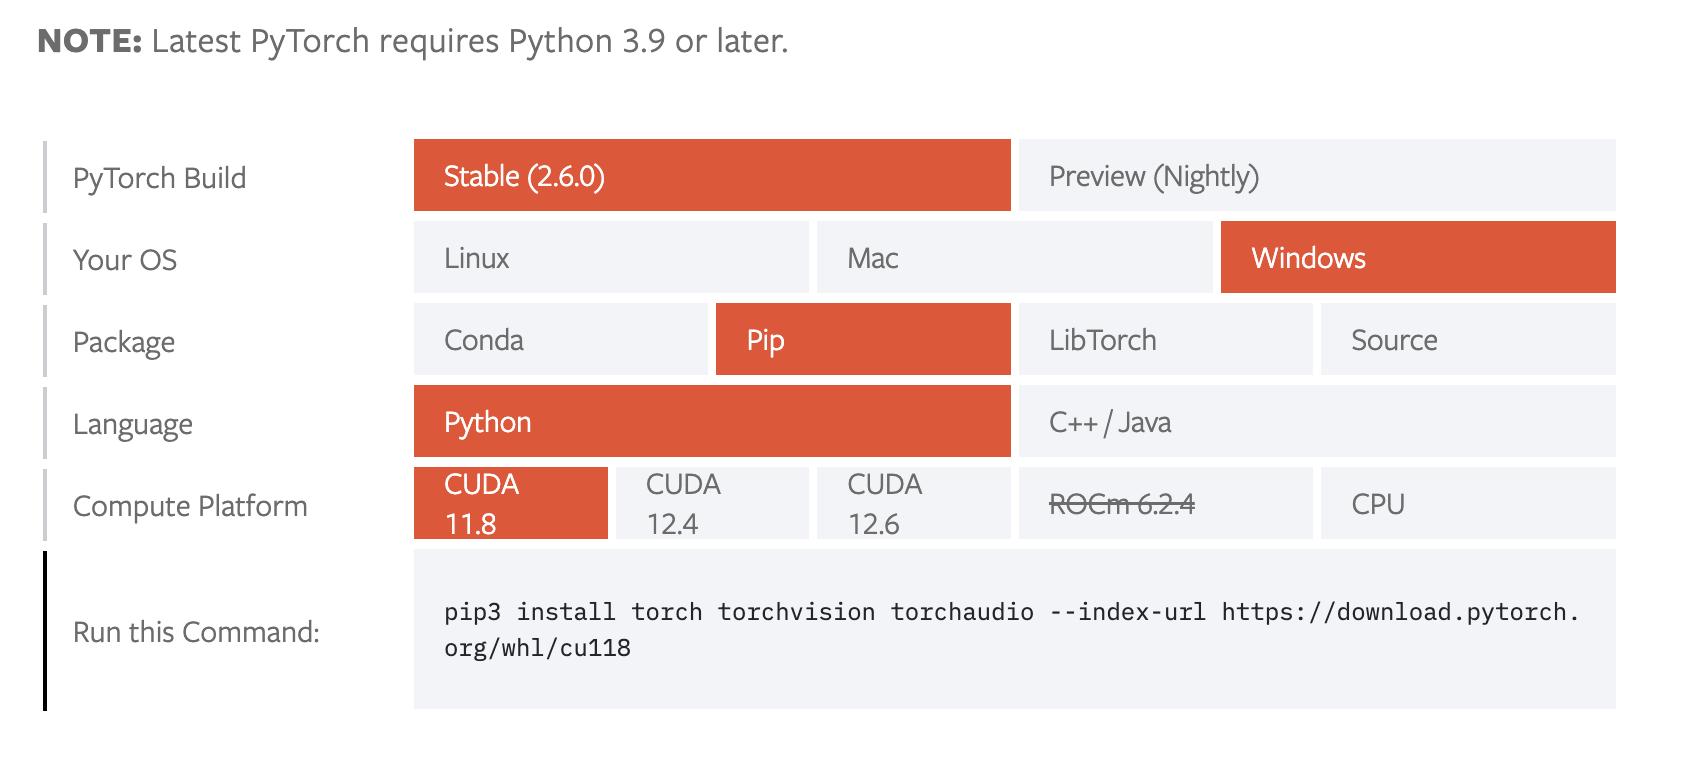
1 | pip3 install torch torchvision torchaudio --index-url https://download.pytorch.org/whl/cu118 |
训练
通过网络上的数据集训练
融合情感数据集 数据集
1 | A merged emotions dataset was created using a highly curated subset of ExpW, FER2013 (enhanced with FER2013+), AffectNet (6 emotions), and RAF-DB in YOLO format, totaling approximately 155K samples. A YOLOv11-x model, fine-tuned on the WiderFace dataset for the bounding boxes, was used. The distribution is as follows: |
通过以下链接下载
https://huggingface.co/datasets/AdamCodd/yolo-emotions/blob/main/README.md
路径结构

1 | # 数据集根目录(绝对路径) |
训练脚本
1 | from ultralytics import YOLO |
中断训练继续脚本
1 | from ultralytics import YOLO |
验证初步训练模型精确度
图片检测
1 | import os |
视频检测
1 | from ultralytics import YOLO |
检测结果
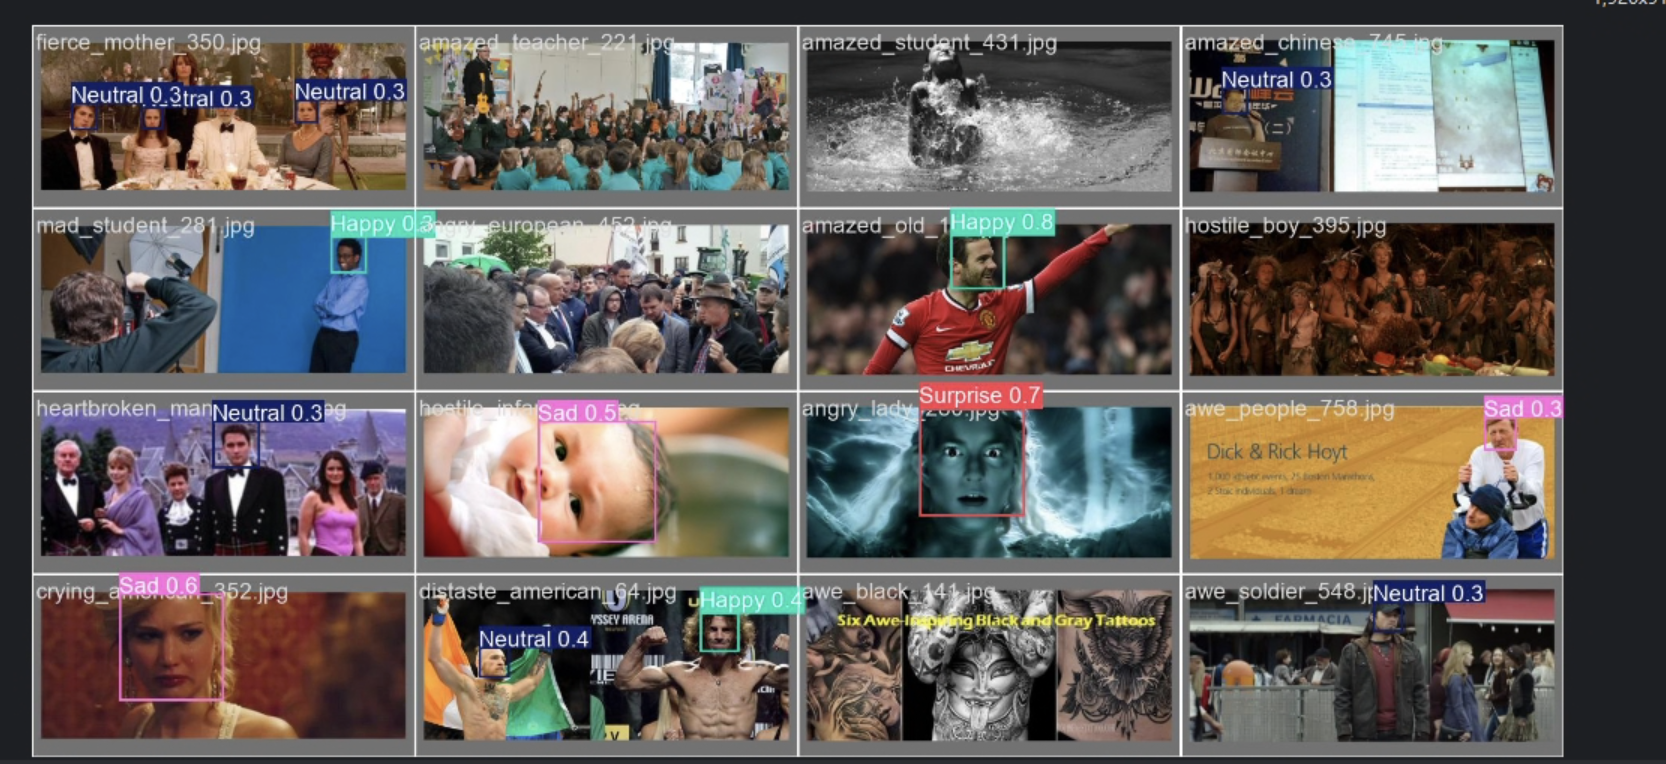
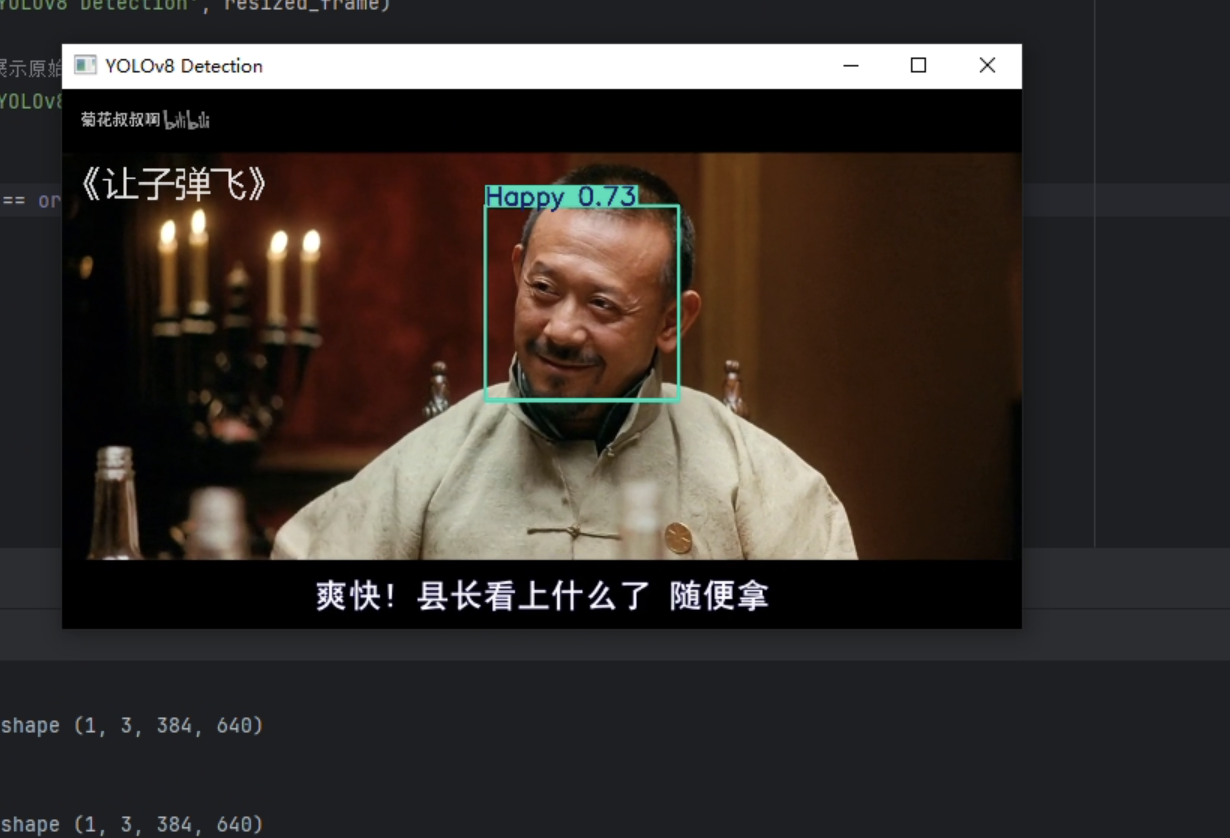
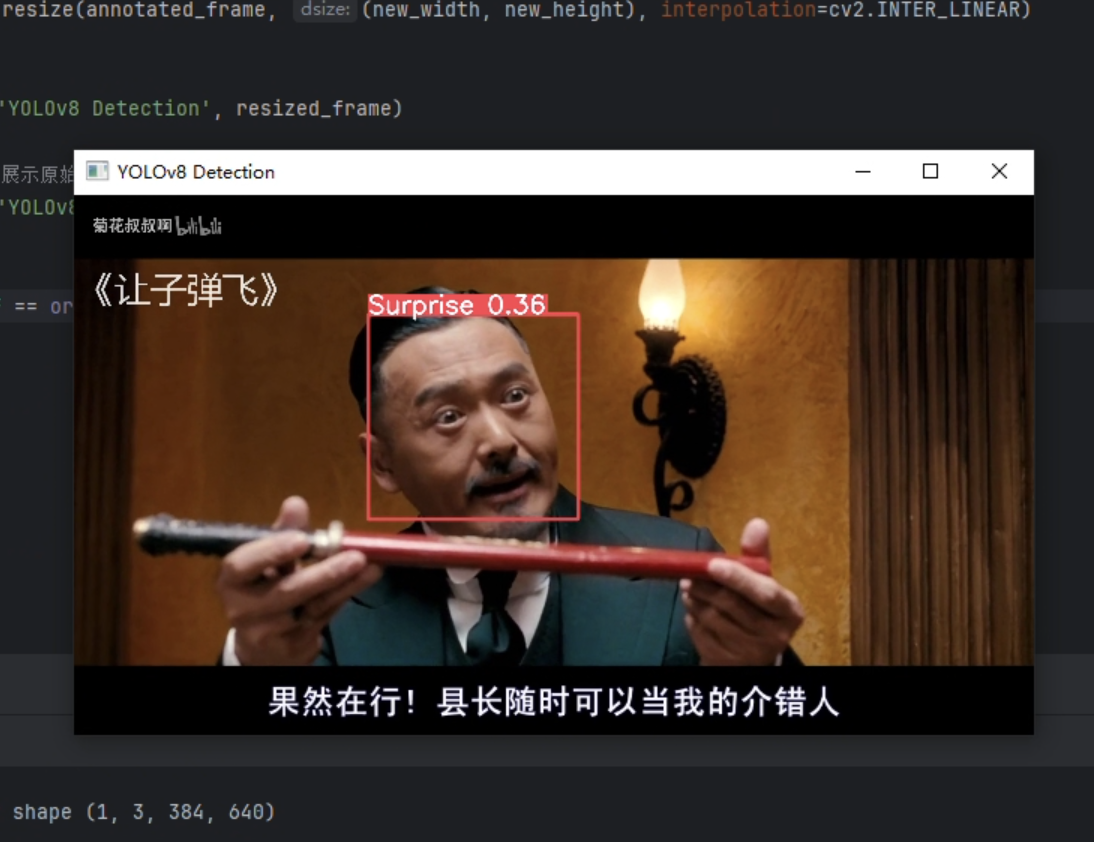
经过初步检测,对于图片的检测效果较好,但对于多对象的检测,侧脸的检测效果较差。对于视频检测只对较为明显的表情检测效果尚可。多对象的检测速度最多不超过200ms,速度较快。
图片
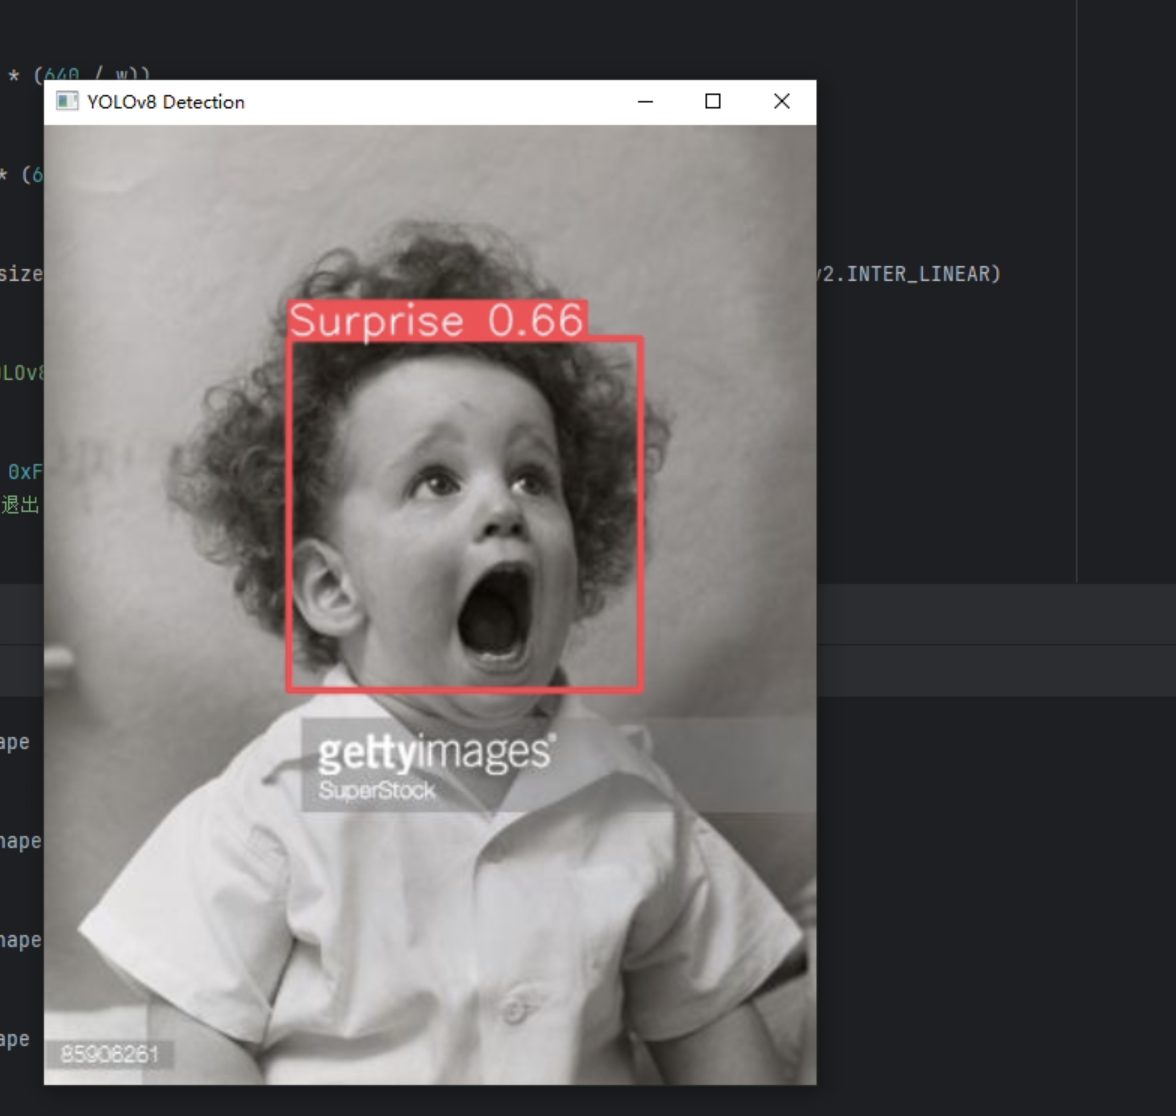
视频
判断可能由于数据集过大(10w+图片),训练轮次初步只设置了一百轮(耗时20h),且置信度还在上升,未触发patience early stop 机制。
下一步同步进行200轮训练与对于当前模型的初步改进算法。
改进
插入模块方法示范
添加模块方法
1 | # example_mod.py such as GAM_Attention |
1 | cd C:\Users\pan_0624\miniconda3\envs\yolov8_project\Lib\site-packages\ultralytics\nn\modules |
编辑__init__.py导入上文提到的模块,这里__init__.py实现的是对模块的二次封装,控制上层可访问的接口
1.从当前路径的py文件中导入类
1 | from .new_mod import GAM_Attention |
2.设置外部可访问的类名(接口),在尾行添加刚才导入的类
1 | __all__ = ( |
编辑task.py
1 | nano tasks.py |
编辑关键函数parse_model(解析 YOLOv8 的模型配置文件,生成pytorch类型的模型结构)
1 | # 添加GAM_Attention的通道数调整部分 |
制作客制化配置文件custom_yolov8.yaml
1 | # 导入模块后修改客制化yolov8.yaml配置文件 |
- Backbone 负责从输入图像中提取多尺度的特征图,这些特征图包含了图像的边缘、纹理、形状等信息。
- Head 利用这些特征图进行目标检测,输出每个目标的边界框、类别和置信度分数。
1 | # custom_yolov8.yaml |
修改train.py
1 | from ultralytics import YOLO |
训练后重新检查置信度和F1-Confindence Curve(综合置信度曲线),多次变换位置,找到正提升最大层数,固定层数,尝试添加更多模块。
评估模型效果
模块一:GAM_Attention
上文示范使用的就是GAM_Attention模块,接下来逐步切换模块所放置的层,测试模块最终效果
插入backbone第九层
1 | # Ultralytics 🚀 AGPL-3.0 License - https://ultralytics.com/license |
查看模型效果
查看PR图发现mAP没有明显提升甚至下降了
模块二 Swin Transformer 无效
模块三 Down_wt卷积 有效提升10%
- 需要关闭amp-混合精度训练
- batch30和batch16下都有提升
- 配置文件 yolov8-Down_WT.yaml
- 结果保存在yolov8-Down_WT.yaml_used_no_amp_batch30文件夹及对应验证文件夹下
- epochs=200 amp = False batch=30/batch=16
- 参考csdn https://blog.csdn.net/qq_64693987/article/details/143125567